使用 GPG 加密 Github Commits
GnuPG(简称 GPG),它是目前最流行、最好用的开源加密工具之一。
GPG 有许多用途,比如对文件,邮件的加密。而本文要说的是,如何使用 GPG 来加密 Github Commits。
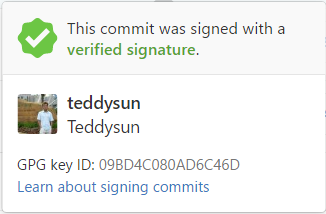
在 Github 上查看一些项目的 Commits 时,偶尔会发现「This commit was signed with a verified signature.」字样,具体来说,就是下图示例那样。
一、安装 Git 和 TortoiseGit
关于如何在 Windows 下安装 Git 和 TortoiseGit。
官方网站:
https://git-scm.com
https://tortoisegit.org
二、生成密钥
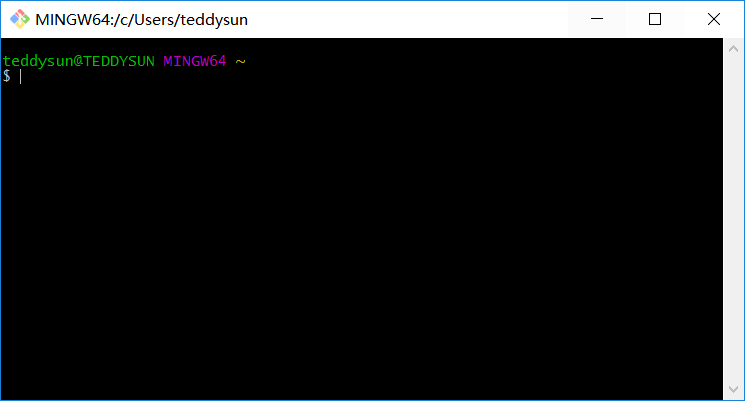
在安装完 Git 之后,开始菜单项里会有个 Git Bash,打开,如下图所示:
Git 自带了 gpg 命令,因此可以直接在 Git Bash 里生成密钥。命令如下:
选 1,回车。
选择密钥长度,默认为 2048,建议输入 4096。
设定密钥的有效期。
输入 0,回车。
系统会问你上述设置是否正确。
系统会要求你输入个人信息。
系统会再次让你确认填入的信息。
系统会让你设定一个私钥的密码。
系统这时开始生成密钥,这时会要求你做一些随机的举动,以生成一个随机数。你拿起鼠标随便晃晃,直到完成密钥生成。
命令如下:
第二行显示公钥特征(4096 位,Hash 字符串和生成时间)
第三行显示用户信息
第四行显示私钥特征
四、输出密钥
公钥文件(.gnupg/pubring.gpg)以二进制形式储存,armor 参数可以将其转换为 ASCII 码显示。
同时,export-secret-keys 参数可以转换私钥。
五、上传公钥至 Github 帐号
点击用户头像,打开 Settings,左侧菜单点击 SSH and GPG keys,在 GPG keys 那里,点击 New GPG key。
在输入框里填入刚刚导出的 public-key.txt 内容。
点击 Add GPG key,完成上传。
六、设置 Git
回到 Git Bash 窗口,根据刚才 gpg –list-keys 显示的结果,此时已经知道密钥 ID 为 0AD6C46D。
设置 Git 使用该密钥 ID 加密:
以后再 Git Commit,同步到 Github 上之后,就会发现该 Commit 已显示 Verified。
GPG 有许多用途,比如对文件,邮件的加密。而本文要说的是,如何使用 GPG 来加密 Github Commits。
在 Github 上查看一些项目的 Commits 时,偶尔会发现「This commit was signed with a verified signature.」字样,具体来说,就是下图示例那样。
一、安装 Git 和 TortoiseGit
关于如何在 Windows 下安装 Git 和 TortoiseGit。
官方网站:
https://git-scm.com
https://tortoisegit.org
二、生成密钥
在安装完 Git 之后,开始菜单项里会有个 Git Bash,打开,如下图所示:
Git 自带了 gpg 命令,因此可以直接在 Git Bash 里生成密钥。命令如下:
gpg --gen-key回车,提示信息如下:
gpg (GnuPG) 1.4.21; Copyright (C) 2015 Free Software Foundation, Inc.选择加密算法,默认选择第一个选项即可,表示加密和签名都使用 RSA 算法。
This is free software: you are free to change and redistribute it.
There is NO WARRANTY, to the extent permitted by law.
Please select what kind of key you want:
(1) RSA and RSA (default)
(2) DSA and Elgamal
(3) DSA (sign only)
(4) RSA (sign only)
Your selection?
选 1,回车。
选择密钥长度,默认为 2048,建议输入 4096。
RSA keys may be between 1024 and 4096 bits long.输入 4096,回车。
What keysize do you want? (2048)
设定密钥的有效期。
Please specify how long the key should be valid.密钥只是个人使用的话,建议选择第一个选项,即永不过期。
0 = key does not expire
<n> = key expires in n days
<n>w = key expires in n weeks
<n>m = key expires in n months
<n>y = key expires in n years
Key is valid for? (0)
输入 0,回车。
系统会问你上述设置是否正确。
Is this correct? (y/N)输入 y,回车。
系统会要求你输入个人信息。
You need a user ID to identify your key; the software constructs the user ID「Real name」填入你的名字,需是英文。回车。
from the Real Name, Comment and Email Address in this form:
"Heinrich Heine (Der Dichter) <heinrichh@duesseldorf.de>"
Real name:
Email address:「Comment」可以空着不填。回车。
系统会再次让你确认填入的信息。
You selected this USER-ID:输入 O,回车。
"Teddysun <i@teddysun.com>"
Change (N)ame, (C)omment, (E)mail or (O)kay/(Q)uit?
系统会让你设定一个私钥的密码。
You need a Passphrase to protect your secret key.注意这里要留空不填,直接回车即可。这是因为 TortoiseGit 不支持 1.4.x 含有私钥密码。
Enter passphrase:
Repeat passphrase:
系统这时开始生成密钥,这时会要求你做一些随机的举动,以生成一个随机数。你拿起鼠标随便晃晃,直到完成密钥生成。
We need to generate a lot of random bytes. It is a good idea to perform最后,提示生成完毕。
some other action (type on the keyboard, move the mouse, utilize the
disks) during the prime generation; this gives the random number
generator a better chance to gain enough entropy.
gpg: key 0AD6C46D marked as ultimately trusted三、列出密钥
public and secret key created and signed.
命令如下:
gpg --list-keys输出结果如下:
gpg: checking the trustdb第一行显示公钥文件名(pubring.gpg)
gpg: 3 marginal(s) needed, 1 complete(s) needed, PGP trust model
gpg: depth: 0 valid: 1 signed: 0 trust: 0-, 0q, 0n, 0m, 0f, 1u
/c/Users/teddysun/.gnupg/pubring.gpg
------------------------------------
pub 4096R/0AD6C46D 2017-02-22
uid Teddysun <i@teddysun.com>
sub 4096R/5BB7BB4E 2017-02-22
第二行显示公钥特征(4096 位,Hash 字符串和生成时间)
第三行显示用户信息
第四行显示私钥特征
四、输出密钥
公钥文件(.gnupg/pubring.gpg)以二进制形式储存,armor 参数可以将其转换为 ASCII 码显示。
gpg --armor --output public-key.txt --export [密钥ID][密钥ID]指定用户的公钥,如 0AD6C46D,output 参数指定输出文件名,如 public-key.txt同时,export-secret-keys 参数可以转换私钥。
gpg --armor --output private-key.txt --export-secret-keyspublic-key.txt 和 private-key.txt 默认会导出至用户目录 C:\Users\<用户名>\ 下。
五、上传公钥至 Github 帐号
点击用户头像,打开 Settings,左侧菜单点击 SSH and GPG keys,在 GPG keys 那里,点击 New GPG key。
在输入框里填入刚刚导出的 public-key.txt 内容。
点击 Add GPG key,完成上传。
六、设置 Git
回到 Git Bash 窗口,根据刚才 gpg –list-keys 显示的结果,此时已经知道密钥 ID 为 0AD6C46D。
设置 Git 使用该密钥 ID 加密:
git config --global user.signingkey 0AD6C46D设置 Git 全局使用该密钥加密:
git config --global commit.gpgsign true最后,再输入以下命令查看 Git 配置情况:
git config -l包含以下信息。
user.signingkey=0AD6C46D至此,使用 GPG 加密 Github Commits 就正式完成了。
commit.gpgsign=true
以后再 Git Commit,同步到 Github 上之后,就会发现该 Commit 已显示 Verified。

